There's an old saying that goes something like this: "the smartest rider wins the race, not the strongest." Part of being a smart rider is being able to read the road and adjust your efforts accordingly. I've talked a lot on this blog about climbing position and climbing efficiency, but all the technique and efficiency in the world won't do you any good if you don't use it properly. So, that being said, let's take a look at how to read the road.
Combating Illiteracy
Being able to read the road will allow you to conserve energy and make moves on steeper slopes, or to prevent gaps from opening, keeping you in the group and in the draft.
The key to reading the road is to keep your head (or at least your eyes) up the road. You should always be scanning the road ahead to see what the terrain is throwing at you. In most cases, people will be looking for rises and hills in their way, so we'll focus on those.
The road goes where?
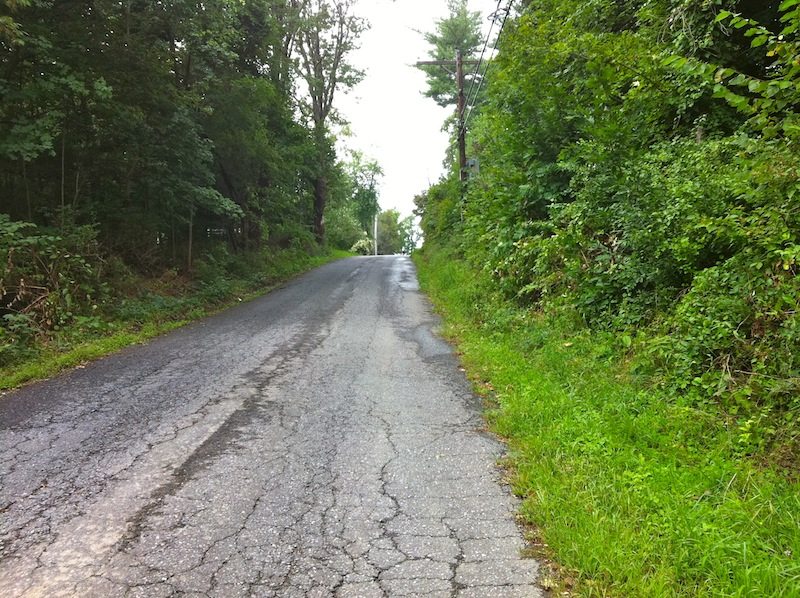
When people see the road go upward, they tend to panic. But just a cursory look at the terrain and a little thought can reveal a lot about the climb ahead. Let's look at an example first:
This climb is relatively short (about 200 meters in length) and fairly benign at about 5% grade (photos are deceptive in showing the grade of climbs, unfortunately.) But take a long look at the climb and see what you can discern just from the photo.
What you should take a way from the photo is that the climb is fairly steady gradient and it has a summit that leads to a flat/downhill. But how did we get there? First, look at the road up to the summit; you'll see a smooth slope with no substantial undulations. This means that you can ride the climb at a steady pace, without having to stand up and fight a steeper gradient, and you can evenly measure your effort across the climb. Following the road further up the climb, you'll look past the summit of the climb to some trees, telephone poles and a little bit of clear sky. After seeing that, you'll know that the road transitions from a climb to a flat/downhill. In this case, because you can see the trees "shorten" up further from the summit, you'll know that the road dips down slightly. The fact that you can see open sky among the trees behind the summit also gives away the fact that the road dips into a slight downhill.
Combine those two pieces of information and you now know how to ride the climb: it's short and flattens/drops after the summit, so you can ride it hard at an increasing pace, even hammer over the top and not be penalized too badly.
Moving on up
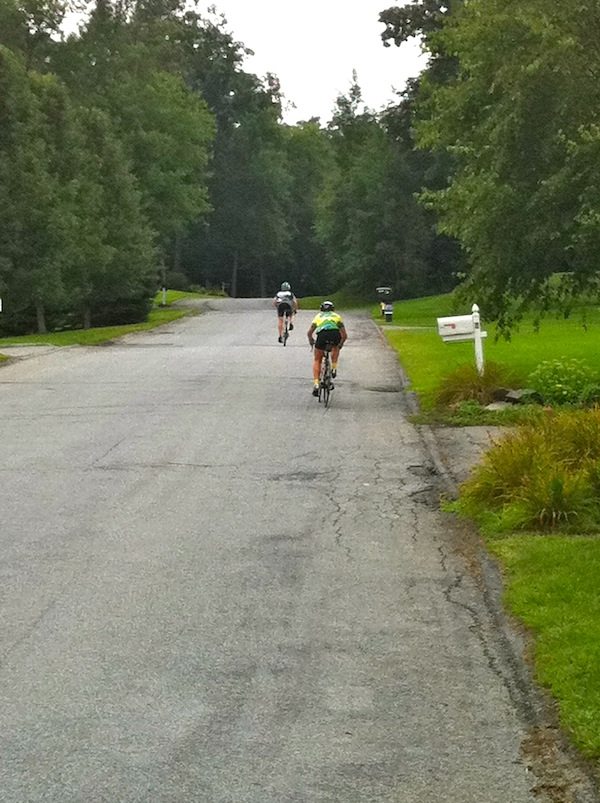
With a nice short climb done, we can look at something a little longer. Take a look, see what you can see, and then read on:
Looking closely at this climb, you'll see it is about 400 meters in length, averaging about 7.5% grade. Building on our previous exercise, we'll see a reasonably steady grade until a false flat near the top of the climb, then we see the road summit and turn to the right as it summits. Looking beyond the summit we see the trees get slightly smaller, but not like the previous example: this would indicate that the climb either flattens out or continues as a false flat (in this case, it is a false flat.) So the takeaway message here is: a steady state climb, false flat and steeper section near the summit, with a possible false flat at the top of the climb. This means that you'll not want to hit this climb full gas, saving a little bit in the legs to keep you going up the false flat.
Out of sight
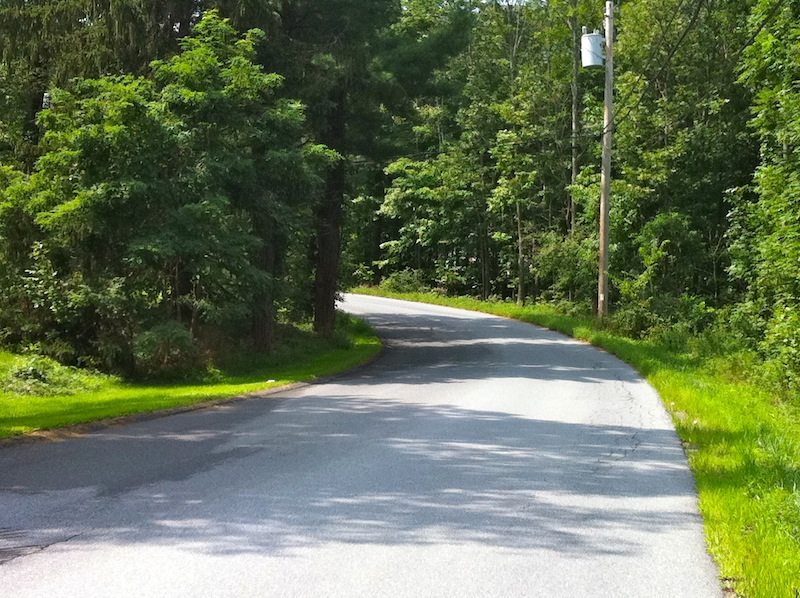
Although straight climbs are the norm for many parts of the US, there are plenty of exceptions out there, and they can be the hardest to read (since they don't show much of themselves at a time.) Take a look at the next photo and see what you can figure out, then read on for the explanation:
Seeing the road curve off out of sight can be intimidating. Rarely do roads switchback out of view and then flatten out: the idea of a switchback is to cut the gradient down and make in manageable to travel. In this case, a quick glance will show that the road begins pitching up as it curves off to the left and out of sight. You'll note that you can't see the climb continue, and in this photo you can't see the trees continue to rise up the climb to the left of the photo. Looking at the road ahead, you'll want to plan for a longer climb, and one that's varying in gradient (since switchbacks are placed to make the gradient more manageable and varied.) In this case, the climb pitches up as it curves around (8%) then flattens out (5.5%) and then kicks up again further up the road (9%.) In this case, you'll want to ride the climb conservatively, not making any moves until you can see the summit and keeping plenty left in reserve for any unexpected surprises beyond the curve in the photo.
Summing it up(hill)
Reading the road is an essential skill, but it is one that takes a lot of practice to be able to do quickly and efficiently. The best way to learn how to read climbs is to get on them and make mistakes, learn from them and apply those lessons to the next climb.
Questions? Comments? Clear as mud or muddy as gin? Let me know by posting a comment below!


