
Zwift is the training “video game” that has taken the cycling world by storm. The Zwift app allows cyclists from around the world to connect with one another. They can ride alongside each other from all corners of the globe, and the virtual environment allows people of very different fitness levels to ride together. With the right equipment, your indoor training can closely mimic an outdoor ride without the cars, bugs or potential for crashing.
I'll show you how to get started with Zwift and how you can jump online today and start your Zwift training adventure!
Things You'll Need To Get Started On Zwift
Getting started on Zwift doesn't have to be difficult. If you have an indoor trainer, you're already most of the way to starting on Zwift. The only things you'll need to start training with Zwift are the app itself and a way to connect your bike and sensors to the app. You can do this in a number of different ways, each with its own pros and cons. Check out the recommendations after the jump and figure out the best way to connect to Zwift.
The Zwift App | Sensors and Connecting – Bluetooth – ANT+ | Trainers | Tips for training with Zwift
Download The Zwift App
When you look at the Zwift ecosystem, you'll find a couple of options for downloading the app. There's a desktop/laptop version and a mobile version, and I'll explain both of them below.
 Desktop Zwift app
The desktop Zwift app is the original Zwift interface. It's how early adopters started testing the program, and it's probably the best way to run Zwift. It has what seems to be the smoothest graphic display. You'll find every possible option available on this platform. You'll also find navigation to be much easier when you're using a mouse or touchpad as opposed to the touchscreen of the mobile app. The desktop Zwift app can downloaded here.
As a word of warning: be sure to check the system requirements first; I know a number of people running older computers that had issues getting started with Zwift. Once you install the app and create your account, you can log in and start thinking about training.
Once you install the app and create your account, log in and start thinking about training. Before you get started, though, you'll need a couple of other things to connect your bike to Zwift. I'll detail those a little bit later.
Mobile Zwift app
Zwift has a presence on mobile platforms as well. The biggest issue that plagued early users of the app was the lack of Bluetooth sensor connection. Now, Bluetooth integration is part and parcel to Zwift's mobile experience. Since most people don't use Bluetooth sensors on their bike, you'll need a way to get ANT+ data to your device. This usually means you'll need an [easyazon_link identifier=”B0042WGO3Y” locale=”US” tag=”taicoaandthed-20″]ANT+ dongle like this one[/easyazon_link] to receive ANT data from your sensors. In most cases, you'll also need [easyazon_link identifier=”B0149QE3LC” locale=”US” tag=”taicoaandthed-20″]an adapter[/easyazon_link] to connect it to your phone.
There are some differences between the iPhone and iPad apps, and they will probably dictate which app you prefer to use.
The iPad app that Zwift developed is really a miniaturized version of the desktop app. You have full functionality just as you would with the desktop version and it's simple to connect all your sensors via Bluetooth or via ANT with an external dongle. You can view the heads up display just like you would on your PC. With a couple of extra cables ([easyazon_link identifier=”B009WHV3BM” locale=”US” tag=”taicoaandthed-20″]Lighting to HDMI[/easyazon_link] and an [easyazon_link identifier=”B014I8T0YQ” locale=”US” tag=”taicoaandthed-20″]HDMI cable[/easyazon_link]), you can attach your iPad to your TV and have a very simple to set up training ecosystem. You'll just plug in your iPad, log in and start training, which is just like using the desktop app.
 The iPhone app is really just an abbreviated version of the desktop app, and functions more like a controller. In reality, it's a quick link between your computer and you. There are no terrain visuals on the iPhone app screen. You just get a visual representation of who's riding, who's around you and some other options for controlling your desktop app. The most useful of these is the “course selection” buttons. These pop up at certain points in the course and allow you to change directions. Don't feel like climbing the mountain? Hit the “go straight” button and take it easy today.
Another thing you'll find on the iPhone app is the ability to follow people and see who's around you. This is how you'll meet up with friends or give “ride ons” to others while you're training.
Overall, the desktop app and the iPad app offer the most to your training experience. As I mentioned earlier, though, you need a way to connect to your devices.
How to Connect to Zwift
Once you have an account and you're ready to ride, you need a way to get your data into Zwift. There are a couple of ways to do this, which I'll detail for you.
Bluetooth connectivity
Currently, you can use your computer's Bluetooth chip to connect any compatible sensors with Zwift. You'll simply enable the Bluetooth function on the “pair” screen, then Zwift will then search for any Bluetooth sensors in the vicinity. Make sure you wake up any sensors in order to pair, otherwise you may not find them.
A lot of companies make Bluetooth sensors. I'm personally a fan of [easyazon_link identifier=”B01MG9F19N” locale=”US” tag=”taicoaandthed-20″]Wahoo's speed and cadence sensor[/easyazon_link] as well as their [easyazon_link identifier=”B00O5Y4FXA” locale=”US” tag=”taicoaandthed-20″]heart rate monitors[/easyazon_link]. They integrate seamlessly with Zwift via Bluetooth (as I've noted several times when I've forgotten my ANT key while traveling.) You can also use some [easyazon_link identifier=”B00GTK94LQ” locale=”US” tag=”taicoaandthed-20″]Cateye sensors[/easyazon_link] with Zwift through Bluetooth integration. As for power meters, I've always been a big fan of Stages units, and they are natively Bluetooth compatible, so you should have no problem pairing those as well.
Smart trainers are almost always Bluetooth and ANT compatible. Once you wake up the trainer, pair it to Zwift, jump on and start riding. If there's a calibration procedure, follow that first. My recommendation for smart trainers are the [easyazon_link identifier=”B01GA6Z8FO” locale=”US” tag=”taicoaandthed-20″]Elite Drivo[/easyazon_link]Drivo (which I use myself), the Wahoo Kickr and the [easyazon_link identifier=”B01FLKSM7Q” locale=”US” tag=”taicoaandthed-20″]Cycleops Hammer[/easyazon_link].
ANT+ connectivity
ANT+ was originally the only way to connect your bike to Zwift. It's still a pretty solid choice for connecting all your sensors because most Garmin GPS devices use ANT as a transmission protocol. Most people will already have ANT based sensors on their bike, so instead of buying a separate bunch of sensors, just pick up a couple cheap pieces to connect them to your device.
An [easyazon_link identifier=”B00CM381SQ” locale=”US” tag=”taicoaandthed-20″]ANT+ Key[/easyazon_link] is the heart of the connectivity system. You'll need to plug this into a USB port on your computer in order to receive ANT signals through Zwift. Some issues do occasionally crop up with electrical interference from the computer, so Zwift recommends you move the USB stick away from the body of the computer.
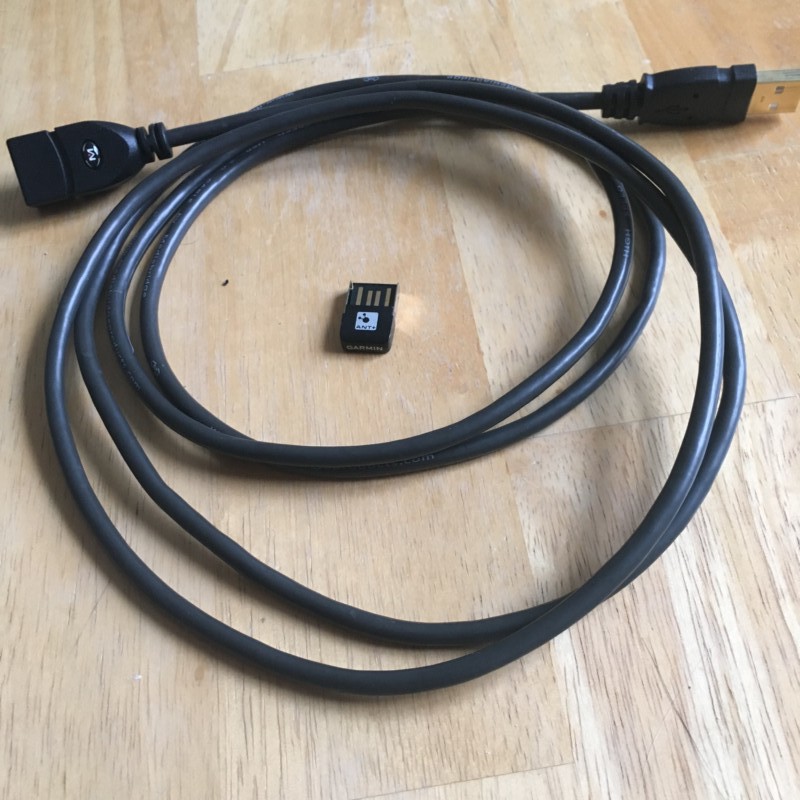 A [easyazon_link identifier=”B00NH12O5I” locale=”US” tag=”taicoaandthed-20″]USB extension cable[/easyazon_link] is the easiest way to move the ANT stick clear of the computer and away from any interference. Simply plug in the extension to a USB port, plug the ANT stick into the extension and then lay it under your bottom bracket. This will prevent a lot of interference in the ANT signal.
(As a side note, ANT+ transmission is a 2.4 GHz signal. This is the same as most router signals which transmit at 2.4 GHz. There's usually a lot of electronic “noise” in an indoor training environment. If you're having trouble with ANT signal dropout, even with a USB extension, consider turning off your 2.4 GHz channel on your router. Switch to the 5 GHZ channel and you'll probably have fewer dropout issues.)
ANT+ sensors are probably the most common sensors you'll run into in a bike shop. There are a ton of different sensors available. Garmin makes accelerometer based sensors that mount on your [easyazon_link identifier=”B00JLMS848″ locale=”US” tag=”taicoaandthed-20″]hub to measure speed[/easyazon_link] and on your [easyazon_link identifier=”B00JLMRXCQ” locale=”US” tag=”taicoaandthed-20″]crankarm to measure cadence[/easyazon_link]. Wahoo makes [easyazon_link identifier=”B00NW882KM” locale=”US” tag=”taicoaandthed-20″]sensors that mount on your chainstay[/easyazon_link] and measure speed and cadence via magnets. Wahoo also makes an [easyazon_link identifier=”B0047840SY” locale=”US” tag=”taicoaandthed-20″]ANT+ only sensor[/easyazon_link] (that I've used for years) that's only around $20 and is nearly indestructible. Cateye makes an ANT+ compatible [easyazon_link identifier=”B00B2PT2L0″ locale=”US” tag=”taicoaandthed-20″]chainstay mounted sensor[/easyazon_link] as well.
For heart rate sensors, I'll always recommend something like the [easyazon_link identifier=”B00O5Y4FXA” locale=”US” tag=”taicoaandthed-20″]Wahoo Tickr[/easyazon_link] that I recommended earlier. Garmin makes one as well, but I've had no luck with it and can't recommend it.
Keep in mind that your speed sensor HAS to be attached to the rear wheel. Your front wheel will be stationary, so you'll have no way of getting speed information from a front wheel sensor.
 Trainers

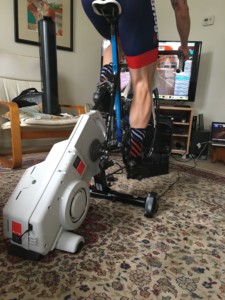
You can't really ride on the Zwift app if you don't have a trainer. There are a ton of options for trainers out there, each with their own pros and cons. I'll give you my recommendations for a couple of different trainers to help you get started.
Smart trainers have really changed the way the Zwift app is used for training. A smart trainer, combined with the Zwift App is one of the best indoor training tools available. The ability to change resistance depending on terrain opens up worlds of training possibilities. A trainer suddenly becomes much more representative of what you'll encounter outside and you'll be able to train in ways never before possible.
Look for ANT+ FE-C compatibility to ensure that Zwift can control your trainer resistance and mimic terrain changes. My recommended trainers are the [easyazon_link identifier=”B01GA6Z8FO” locale=”US” tag=”taicoaandthed-20″]Elite Drivo[/easyazon_link], Wahoo Kickr, [easyazon_link identifier=”B0112VE4NO” locale=”US” tag=”taicoaandthed-20″]Tacx Neo Smart[/easyazon_link] and [easyazon_link identifier=”B01FLKSM7Q” locale=”US” tag=”taicoaandthed-20″]Cyclops Hammer[/easyazon_link].
Smart trainers can be a pretty expensive proposition, so a traditional trainer is a fine fallback. You won't have Zwift controlling resistance, but you'll definitely be able to get an effective training experience. My personal favorite trainer is the [easyazon_link identifier=”B00F4TVDJY” locale=”US” tag=”taicoaandthed-20″]Kurt Kinetic road machine fluid trainer[/easyazon_link]. There's also the [easyazon_link identifier=”B001CJX50K” locale=”US” tag=”taicoaandthed-20″]”Rock ‘n Roll” variety[/easyazon_link] that introduces an elastomer, providing some realistic side to side sway.
Tips for Training With Zwift
Now that you have all the things you need to start training with the Zwift app, you've got a couple of options. You can jump online and just ride, much like you'd go outside without a specific training goal for the day. Or, you can read below to get some tips on how to use Zwift to make your training more effective.
The Ultimate Guide to Training With Zwift has a great overview of all the ways you can train with Zwift.
The Best Training for the Zwift Volcano details the newest expansion to the Zwift universe. I'll show you how to use this mostly flat for a variety of training modes.
Rollover training with Zwift is the perfect way to teach you how to roll a climb. This technique is an important part of your arsenal and will put other riders in difficulty quickly. Using Zwift to practice can make this technique almost second nature, and you'll soon find yourself leaving your riding buddies in the dust.
Fartlek Training with Zwift details how “disorganized” training can be beneficial. I'll also teach you how to use the Zwift universe to accomplish this simple task.
Building your own workouts is a snap with the Zwift Custom Workout builder. You'll learn how to use the workout builder and turn Zwift from a novelty into a powerful training tool.
Muscular Endurance training with Zwift details how to use the “free ride” side of Zwift to build fatigue resistance. Check out the video and learn how to use the Zwift mountain to build the most fatigue resistant legs you've ever had!
Of course, if you're looking for help in building your training program, I can help you out. Check out my downloadable training programs and grab something to get a jump start on your training. Or, jump on over to my contact page and shoot me an email with your questions. I'll get you going in the right direction!

