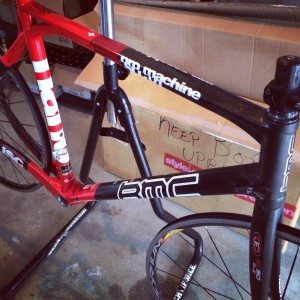
 [dc]B[/dc]uilding your own bike can seem like a daunting task to anyone. Beginners to the sport, long time riders, racers…almost everyone has some hangup about building a bike. When you break it down into easily digestible bites, building a bike is nothing more than a series of simple part installations. From a simple derailleur install to complex drivetrain tuning, this series of video blogs will detail the process of building a bike (in this case my BMC ProMachine SLC01 race bike for this season) from a bare frame into a functioning ride.
Last time, we looked at how to install a bottom bracket and crankset. In this post, my video blog will detail the installation of the front derailleur and front derailleur clamp onto the seat tube, as well as basic positioning of the derailleur. After watching the video, check below to see a few of my tips and tricks, and remember to post any questions to the Tailwind Coaching Facebook Page.
Tips, tricks and things to keep in mind while building:
- Get all your tools and parts together and laid out before you start building. There's nothing worse than getting half way through installing a part and realizing you can't find XYZ tool.
- Some frames do not require a clamp (they have a “braze on” tab to mount the derailleur to. In that case, you'll use the concave washer that comes with the derailleur to mount it to the tab, and you'll make adjustments to height and rotation by moving it before tightening the derailleur to the tab.
- Be sure to grease the derailleur clamp screw and derailleur mounting screw to prevent them from binding together.
- The optimal distance between the outer cage of the front derailleur and the outer/large chainring is 1-2 millimeters.
- Don't bother to tighten down the seat tube clamp yet: we still have to tune the bike once the cables are installed, and we may need to move the derailleur to find optimal shifting.
- Don't overtighten! Overtightening parts, especially carbon parts, can cause irreparable damage. Use a torque wrench if you're unsure.
If you have questions about installing your front derailleur, post them to the Tailwind Coaching Facebook Page. Once you've got your bottom bracket and crank installed, check out the rest of my “Building Your Own Bike” series on Vimeo or click on the following links:
Building Your Own Bike – Crankset Installation
Building Your Own Bike – Rear Derailleur Installation
Building Your Own Bike – Handlebar Installation (Coming Soon)
Building Your Own Bike – Shifter Installation (Coming Soon)
Building Your Own Bike – Brake Installation (Coming Soon)
Building Your Own Bike – Chain and Pedal Installation (Coming Soon)
Building Your Own Bike – Cable and Housing Installation (Coming Soon)
Building Your Own Bike – Tuning Shifting (Coming Soon)